I can confidently say it varies on many factors including locale and parental gender, but I can't truly give you an accurate answer (although I found this great article that includes a nifty graph).
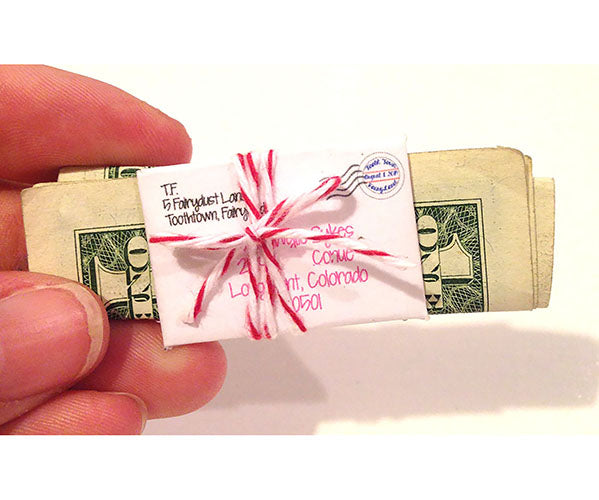
What I can provide is a fun tutorial for a tooth fairy sized letter and envelope that will make everyone think you have excellent penmanship (no writing is necessary) and will set the bar very high among your crew of mamas.

1. White Cardstock
2. Computer with Microsoft Word or an equivalent program
3. Printer
4. Scissors or exacto knife
5. Glue stick or glue runner
6. Digital word file containing template,
located here
7. KG Seven Sixteen Font (optional), available for free here

1. Begin by downloading the template. Open the file in Microsoft word or an equivalent program. You will probably need to zoom in because it's so tiny!
2. If you would like to use the same font that is shown in the the example pictures, you can download it here for free.
3. Double click on the address located on the envelope. Delete the example name and address and type your child's name and address
4. Double click on the body of the letter. Enter the correct date and the number of teeth lost (this was the first tooth lost so I put in Tooth #1). Highlight the example name and delete it. Enter your own child's name. Customize the message if you would like.
5. Click print setup. Make sure you have it set on the highest quality printing available. Otherwise it will print very grainy. Put the cardstock into your printer and select print.
6. Once you have the piece of paper with the letter and envelope printed on it, it is time to cut them out. You can use scissors, but if you have an exacto knife or rotary cutter you could use those as well.
7. After cutting out the letter and envelope, fold the envelope as pictured below. Glue should be applied with a glue stick or glue runner only on the purple shaded areas in the picture below. Make sure that the name and address are on the outside when you are folding

I hope that you enjoy this tutorial! I would LOVE to see your finished Tooth Fairy Letters! Tag me on instagram @BocoBaby!!!!!